If you want to generate more leads or convert the ones you already have into sales 💪, the B2Chat contacts module will be your greatest ally. With it you can: create new contacts, export databases, set up custom fields for each prospect, filter your searches, and many other options 👨💻.
Follow these steps 👇 to learn how to manage your contacts module:
How to manage the contacts module
Step 1: Enter B2Chat with your username and password🔐.
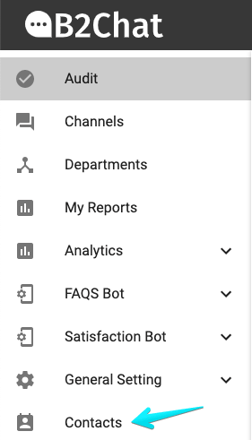
Step 2: Click on the contacts module, located at the bottom left-hand side of your screen.
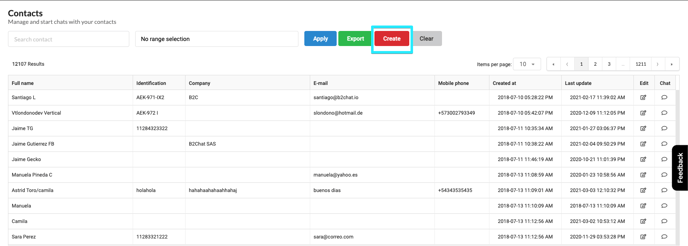
Step 3: Once inside the module, you will see your contacts list at the bottom of your screen. In it, you will find all the contacts that your company has created, either from the B2Chat console or whether you've imported them from a previous file.
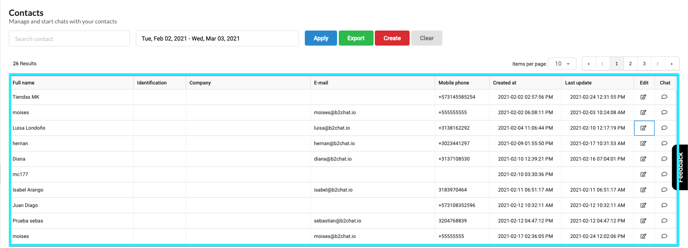
The list is divided into columns that represent each contact's fields 🙋; beginning with the contact's name, their identification, the company, the email, the mobile number, and the dates for which they were created and modified.
At the end of each row, you will see a button called: "Edit", with this option you can update or correct your contacts' information, you can also add 💻 custom fields if you wish.
⚠️ Note: If you want more detailed information on how to edit contacts and what custom fields are, you can consult the article: “How do I edit a contact?"
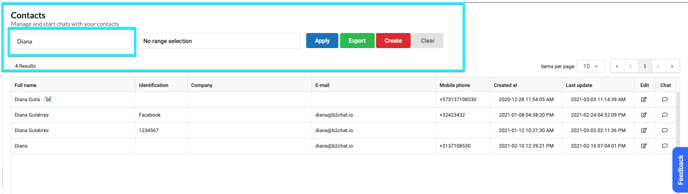
Step 4: At the top left you will find: the "Search box" and the "Date range" both tools are used to filter your contact lists.
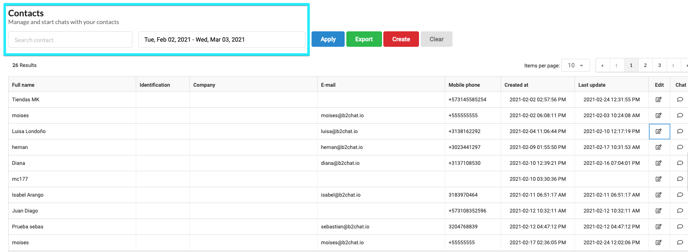
If you need to find a particular contact click on the "Search box", type the name, identification number, or mobile number for the contact, and press the blue button 🔵 called: "Apply".
If what you want is to filter your contact list using a certain creation margin as criteria, click on the "Date Range" 📆 to select a starting and ending date, and once you've limited the time period, press the blue button 🔵 : "Apply".
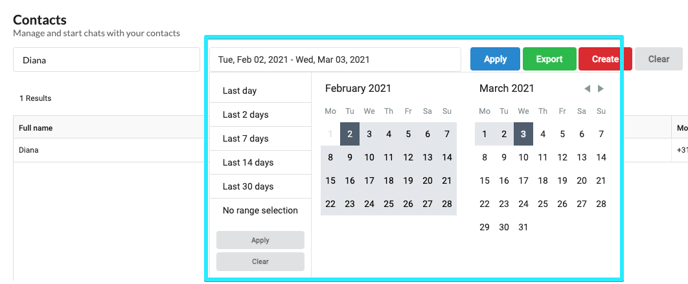
⚠️ Note: You can also use quick filters, by clicking on one of these buttons: "Last day", "Last 2 days", "Last 7 days", "Last 14 days", "Last 30 days"
Finally, you can undo ❌ your searches and view the complete list by clicking on the gray button: “Clear”, located on the upper right-hand side of your screen.
Step 5: If you want to create a new contact for your company, you must click on the red button 🔴 : "Create", located at the top right of your screen.
Complete the fields with your contact's information ✍️ and once you've finished, click on the blue button 🔵 : "Save", located at the bottom of the new window.
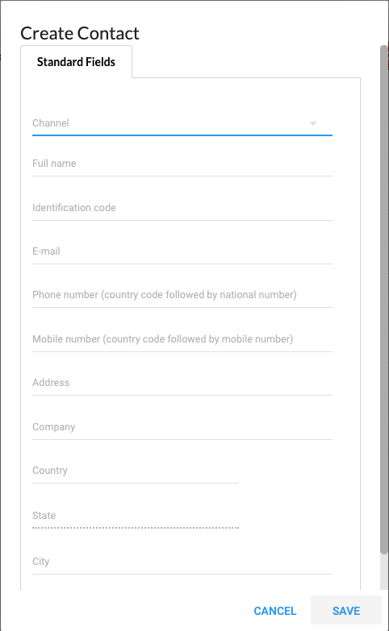
⚠️ Note: If you want more detailed information about how new contacts are created and what each item in the fields is for, you can consult the article: “How do I create a contact?".
Step 6: If you want to have your contact list in a separate file independent from the B2Chat console, you can export it by clicking the green button ✔️ called: “Export” located in the upper right-hand side of your screen.
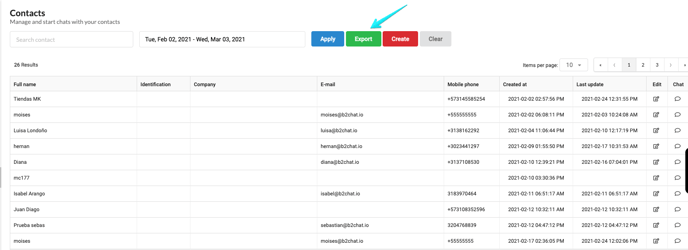
You must enter the email address ✉️ to which you want to send your file, open the email and download the attachment 📎 with your contacts list.
⚠️ Note: If you want more detailed information on how to export your contact lists, you can consult the article: "How to export my contacts from B2Chat?"