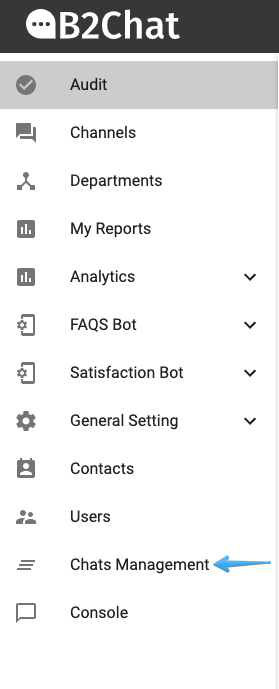
To begin using the chats management feature, you must enter with your administrator user and in the menu select the option Chats management.
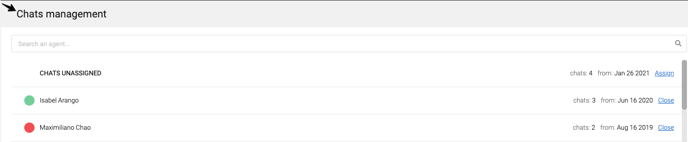
Once there, you will find two options, the first is unassigned chats, where you can assign chats to an agent 👥 and optionally also close them. The second option is to close chats ⛔ from the agent list (the option of closing chats is provided in the agent list). Below we will explain in detail each of these 2 options.
Unassigned chats
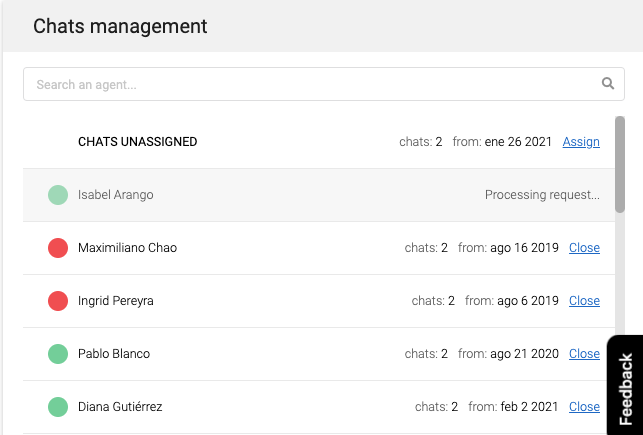
With the option Unassigned chats, we can assign an agent a chat 💬 by selecting the Unassigned chats option or by clicking on Assign, located on the right-hand side of the main page.
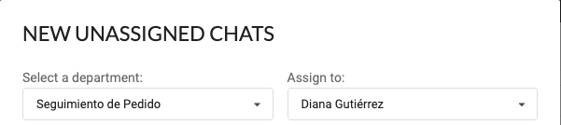
Step 1. When you click on Assign, a form will be displayed 📄 where you will see the fields Department and Assign to, as well as a calendar 📅 where you can select the dates for which you want to assign chats 💬. You will also be able to view the total number of unassigned chats and the total number of chats the agent has.

At the bottom of the page you will have the option to check one of these two boxes: Assign and close or Send exit message. Once you've finished, click the Cancel button or the Request chats assignment button if the close box was left unchecked.
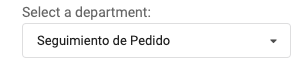
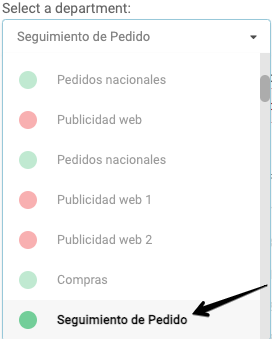
Step 2. Select a department. This step only applies if you've enabled the departments feature.
When the list of departments is displayed, you will see a list of active departments ✅ that have chats in the inbox 📥 and inactive departments 🔘 that currently do not have chats in the inbox.
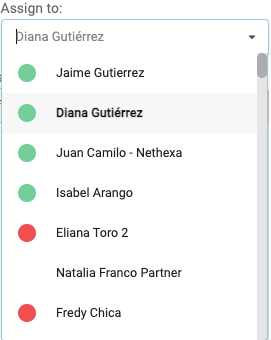
Step 3. After selecting the department, the Assign to option will be enabled, where agents 👥 that are assigned to that department will appear, as well as those agents that are not assigned to any department, if applicable.
Agents will have a green icon when they are active ✅, and they will be displayed with a red icon when they are inactive 🔴 . Remember that you can assign chats 💬 to any agent you want.
Step 4. Select from the calendar the date limit 📅 in which you wish to make an assignment to an agent; you can also select a default date, this option is on the left-hand side ⬅️ of the calendar.

💡 The calendar will be disabled for future dates and for dates prior to the date of the oldest chat 💬 that the business has in its inbox 📥
After selecting the dates on the calendar 📅 , a section will be displayed detailing the transfer of chats between the inbox 📥 and the agent 👥 you previously selected to make the assignment:
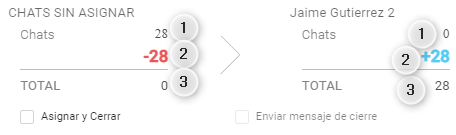
- Chats assigned to each department and chats the agent has, to which chats will be assigned to and closed
- Chats that were selected for the assignment or the process of assigning and closing
- A simulation of the total number of chats that will be assigned to the department and the agent after the assignment or assignment and closure
Step 5. The assignment of a chat to an agent may be requested through the button (Request chat assignment) that will be displayed in blue 🔵.
ℹ️ If you need to assign and close chats for an agent, you will have to check the box ☑️ Assign and close
Step 6. Then, you will see a confirmation message 💬 depending on the case, whether you're closing chats, or closing and assigning chats.
(image)
Once you confirm the assignment, you will be returned to the main page and a Request in Process message will be displayed.
(image)
❗When beginning the process of assigning chats to an agent, the option of unassigned chats and the agent for whom you are performing the process will be blocked; This process will take a few minutes
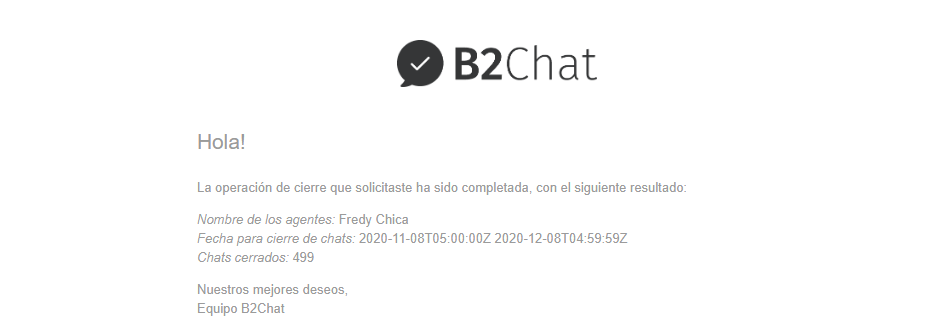
Step 7. An email 📬 will be sent to the person who managed the closure, indicating the number of closed chats, the agent's name, and the date of all closed chats.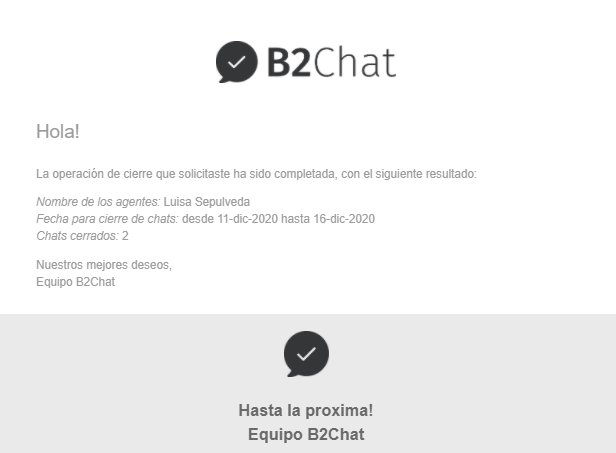
Closing chats from the agent list
This option allows you to close the number of chats💬 that an agent has assigned at that moment. To access the form📄 in order to carry out this action, select an agent 👥 by clicking on their name or select Close, the link located on the right-hand side of the screen.

Below, we will show you how you can close an agent's chats.
Step 1. When you select the agent for whom the chats will be closed, a form will be displayed.
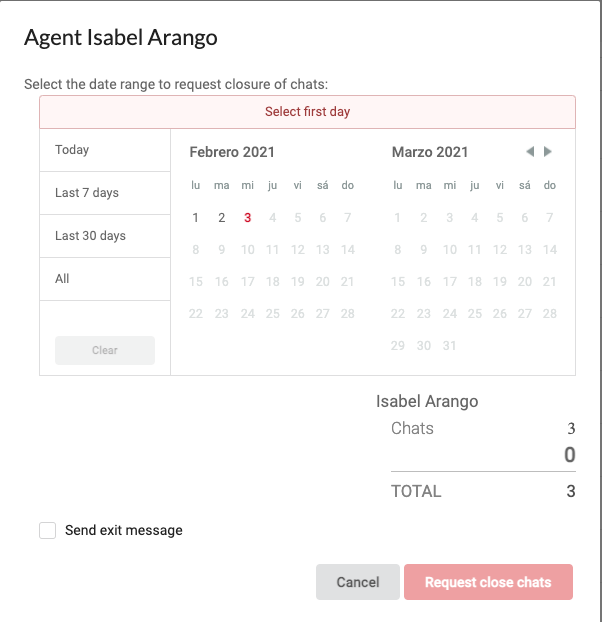
In this form, you will find:
- Calendar: You can use it to select the dates for which you will be closing chats. Here, you will also find default dates 🗓️.
- Calculation simulation: In this section, you will view how many chats the assigned agent has and the simulation of the calculation of how many chats the agent will have after selecting your dates of choice.
- Closing message box: This box is optional, that is, you can send a message to the user about the chat closing if you want to.
You will also see two buttons at the bottom of the form: Request to close chats and Cancel. These will be used to close an agent's 👥 chats 💬 in bulk or to cancel ❌ the action. If you decide to cancel the closing of chats, our system will redirect ↩️ you to the main Chat settings screen.
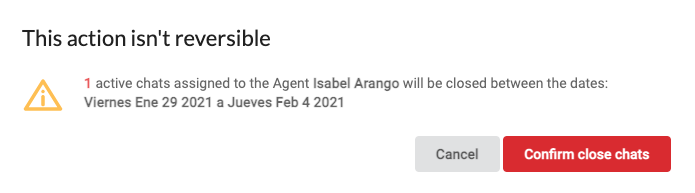
Step 2. After selecting the option to close chats, a confirmation message will be displayed where you will see the name of the agent, the chats to be closed, and the dates of the chats to be closed. You will also see two buttons Close Confirmation and Cancel.
Step 3. Once you select the close confirmation button, the main page for closing chats will appear and the agent 👥 whose chats were closed 💬 will see a message indicating that a request is in process.
When the closing process is finished, you will receive an email 📨 detailing the number of closed chats, the name of the agent whose chats were closed, and the closing date.