Your company does not have a database? 😅 Easy! With B2Chat, you can create one, contact by contact.
Learn how to create a contact ✔️ by following these simple steps and begin receiving more leads for your business.
How to create a new contact
Step 1: Enter B2Chat with your username and password🔐.
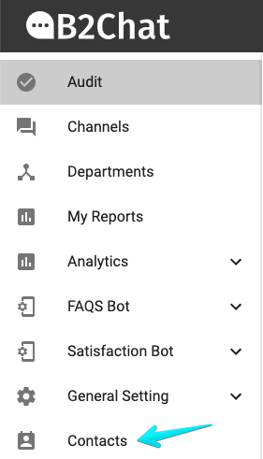
Step 2: Click on the contacts module, located at the bottom left-hand side of your screen.
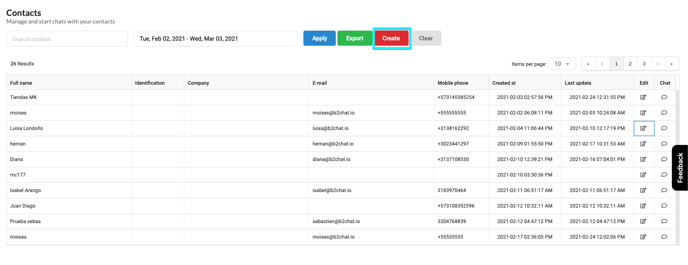
Step 3: Click on the red button 🔴 : "Create" located at the top right of your screen.
 Step 4: Complete the following 👇 standard fields, with your contact information:
👩💻 Channel: Type in the means by which your contact communicates.
👨 Full name: Type in the name that identifies your contact.
🔢 Identification code: Type in a registration number for your contact, this can be an ID, a passport number, or a password, etc.
✉️ Email: Enter an email address to communicate with your contact.
☎️ Telephone: Type in the landline number that your contact has, remember to start with the sign: plus (+), followed by the country's area code, and finally, the number.
📱 Mobile: Type in the cell phone number that your contact uses, remember to enter the plus sign (+), the country's area code, and finally their cell phone number.
📍Address: Type in the address where your contact lives, only if you know it since this field is optional.
🏭 Company: Type in the place where your contact works, if you know it since this field is optional.
🌎 Country: Type in the place from where your contact communicates, you must select it from a list of countries that will be displayed when you click on the field.
🗾 Department: Type in the subregion where your contact lives, this option is enabled only after selecting the country.
🗽City: Type in the city where your contact lives, this place must be selected from a list of cities that will be displayed when you click on the field.
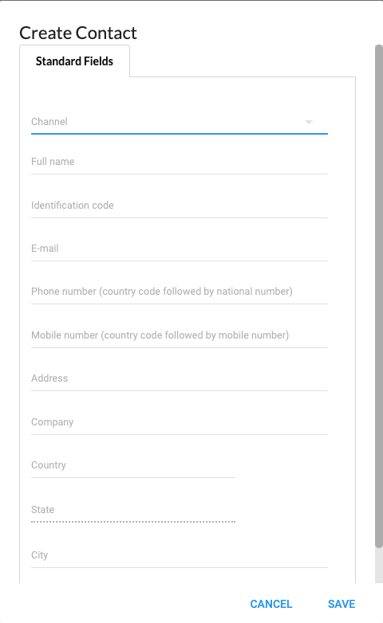
Step 5: Click on the blue button 🔵 : "Save" located at the bottom right of the new window.
⚠️Note: Only the fields: "Name" and "Mobile" are required, the others are optional. However, if you require a field that does not appear in the tab: "Standard", you can use the "custom fields" and with them you add the information that your company needs in a more particular way.
You add custom fields by editing your contact, after having successfully created it. 😜
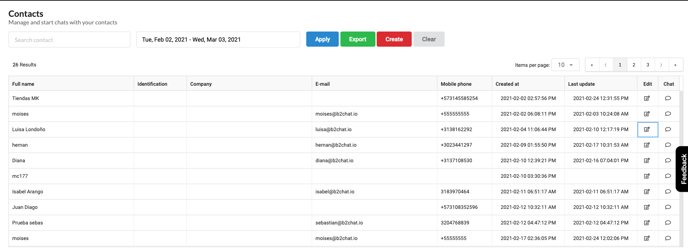
Step 6: Check the contact information you just created in the list and that's it! You already have a new contact in your database.