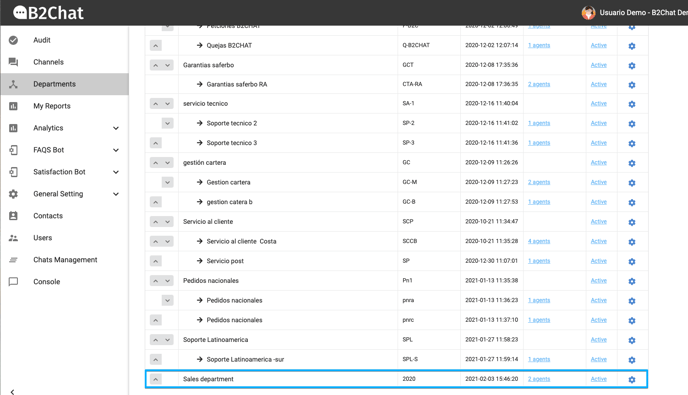
In B2chat, departments fulfill the function of grouping agents to provide specialized customer service through chat. In this article, we will teach you how to create departments for each area of your company.
To start using our departments' feature, follow these steps:
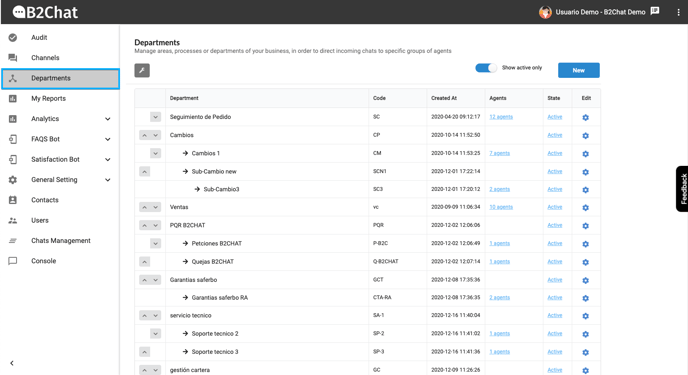
Step 1. With your administrator user👤, click on the Departments feature, located on the upper left-hand side of our menu.
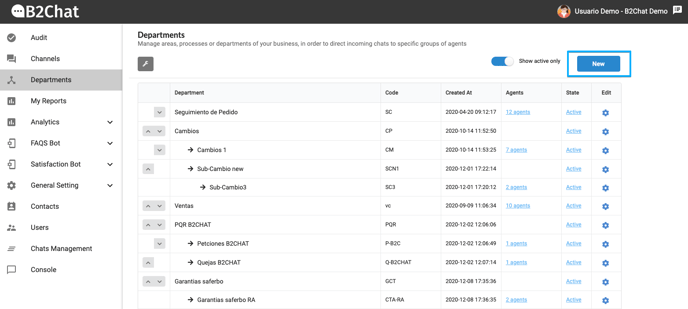
Step 2. Once inside the Departments feature, click on the New button located in the upper left-hand side of the screen.
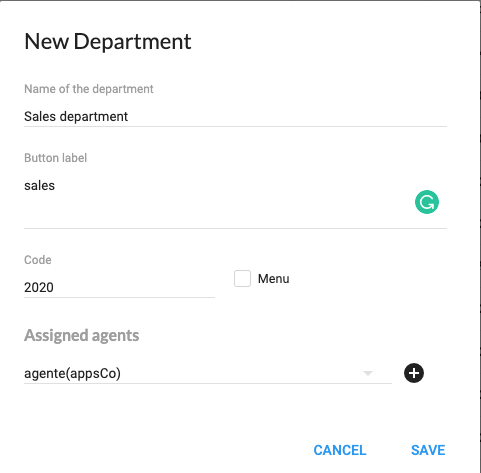
Step 3. A form 📄 like the one seen below will be displayed 👇:
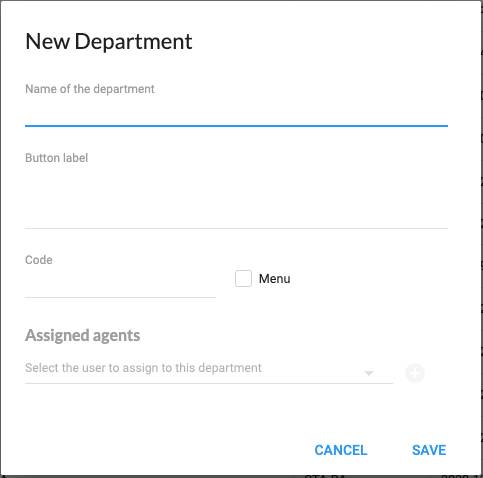
Step 4. Enter the following information to identify your department:
- Name of the department: Choose the name you wish to give to your department (Ex. Sales).
- Button label: Assign a label to your menu. This text will be the one that the contact will see when browsing the department chatbot. The label should be short since for some messaging apps like Facebook and Telegram it is shown inside a button.
- Code: This code helps identify departments within our application. The code can be up to 4 characters long and must be in capital letters (eg. for a technical support department you could use these acronyms: SPT). In B2Chat we suggest that the codes created for each department be mnemonic since they will be used in several areas within our application to quickly identify which department a chat belongs to 💬 (For example, you will see it in the messages 📥 that pop up in an agent's console and in audit reports 📈).
- Assigned agents: Assign the agents that your department will have at its disposal by clicking on the drop-down box. Select the name of the agent 👥 you wish to assign to your department from the drop-down list. Once selected, you can add more agents by clicking on the (+) button located on the right-hand side of the drop-down box. If you want to remove an agent, click on the 🗑️ icon located on the right-hand side of the agent's name 👥. To finish, click the Save button 💾 or click the Cancel button to override the changes you've made.
How to create a departments menu
Our departments feature also allows you to create a menu where you can group your departments into different categories. The purpose of this feature is to help you easily organize and navigate the different areas of your business.
Follow these steps to create a department menu:
Step 1. Create a new department and fill out the form with the details of your new department (follow the steps outlined above ⬆️).
💡Before you begin setting up your departments menu, we suggest you have a clear idea of how you want to categorize and organize the different departments in your business
Step 2. Check the "Menu" box to automatically enable the menu header options and start adding the departments you wish to include.
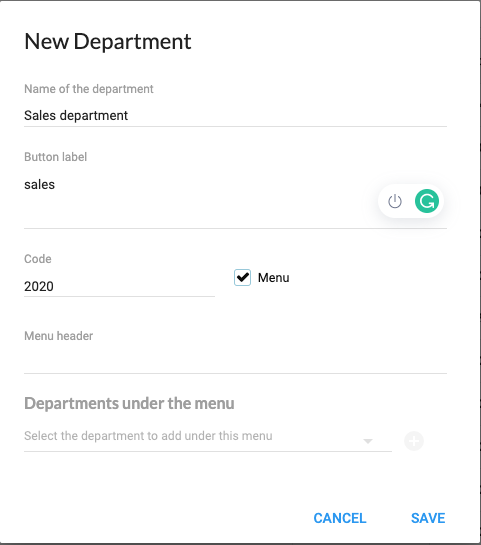
Step 3. Under the heading Menu header, type in the text box ✍️ the name you wish to give your department menu (Eg. Welcome to Sales!).
Step 4. Under the heading Departments under the menu, click on the drop-down box and select the departments you wish to include in the menu. Once selected, you can add more departments by clicking on the (+) button located on the right side of the drop-down box. If you want to delete a department, click on the 🗑️ icon located to the right of the department's name. Finally, click the Save button 💾 or click the Cancel button so that the changes you've made are not saved.
Step 5. Once you've finished, make sure the department you've created appears in the list 👇. You can also test how it will look in your Chatbot 💬🤖.
