In B2Chat there are two types of messages: incoming messages 📩 and outgoing messages 📤. Incoming messages refer to messages that are sent by contacts 👤 and outgoing messages refer to messages that are sent by agents 👥.
In this article, we will explain how to send 📤 and receive 📩 messages from our console and the different types of messages ✉️ that can be received using the instant messaging platforms that we have available. We will also show you how these messages are displayed on our console.
Receiving messages from the console
The B2Chat console is divided into different sections and each one plays an important role for the agent. When receiving messages we focus on two very important sections of the console: the inbox 📥 and the ongoing inbox.
Inbox
When you receive a message, it first has to go through the inbox 📥. The inbox 📥 is the shared area within the console (agent screen) where all messages (chats 💬) sent by contacts appear and are seen by all available agents.

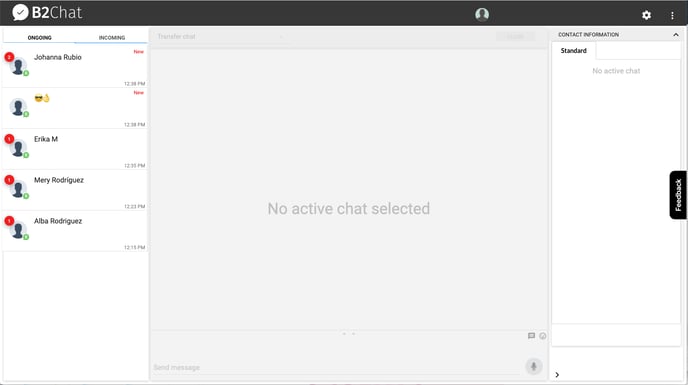
Ongoing inbox
Once a message appears in your inbox, it can be taken by any available agent. When this happens, the message will appear in the agent's ongoing inbox. All the messages that an agent takes from the inbox 📥 appear in their ongoing inbox. These messages (chats 💬) can only be seen by them.
Steps to receive messages from the console
To begin receiving messages, follow these steps:
- Click on Console located in the menu on the left - hand side of the platform.
- Inside the console, click on Incoming. This is your Incoming inbox 📥 where you can see all sent messages ✉️.
- Select the incoming message 📩 that you wish to take for yourself and verify that it appears in your Ongoing inbox where only you can see it.
- Once you have selected the message, the chat 💬 will be activated, and the text box and timeline will be enabled.
- In the Timeline you can view conversation history 💬 by clicking on the blue link (located at the top of the timeline) that says: "See previous chats" or using the scroll bar (on the right side of the timeline). By scrolling through the timeline, you will be able to see the date in which each conversation occurred.
- Messages ✉️ sent by agents will appear on the left side of the timeline while messages sent by contacts will appear on the right.
ℹ️ The timeline is located in the middle of the console and shows conversations that occur in real time between agents and contacts 👥
💡When you click on View previous chats you have a much better view of all past conversations
Instant messaging platforms available
In B2Chat we have integrated different instant messaging platforms. Instant messaging platforms offer a wide variety of benefits for our customers such as speed ⚡, privacy🔐 and message automation ✉️. Not only are instant messaging platforms more popular with users than traditional social networks, but they are also growing rapidly, offering more business potential. Below, we will tell you about each of these platforms and the types of messages and files that can be sent 📤 and received 📩 through them.
- Facebook messenger - With Facebook Messenger, it is possible to send and receive all types of messages and files (JPEG, PNG, GIF, & PDF) including emojis 😉, voice notes🎙️ and images 🌇.
- Telegram - With Telegram, it is possible to send and receive all types of messages and files (JPEG, PNG, GIF, & PDF) including emojis 😉, voice notes🎙️ , and images 🌇.
- Live Chat - LiveChat allows you to send and receive most types of messages (emojis 😉, images 🌇) and files (JPEG, PNG, GIF, & PDF) with the exception of audio 🎙️.
- API Bot - API Bot allows you to send and receive most types of messages (emojis 😉, images 🌇) and files (JPEG, PNG, GIF, & PDF) with the exception of audio 🎙️.
- WhatsApp - With WhatsApp, it is possible to send and receive all types of messages and files (JPEG, PNG, GIF, & PDF) including emojis 😉, voice notes🎙️ , and images 🌇.
Responding to messages from the console
To reply to or send messages from the console, follow these steps:
- To reply to an incoming message 📩 hover your mouse 🖱️ over the text box at the bottom of the console and type in the Send message area.
- If you wish, you can add images 🌁, emojis 😉, files 📂 and voice notes to your message by clicking on the icons next to the text box.
- If you want to increase the size of the text box, click on the arrows ⬆️⬇️ at the top.
- You can send quick messages by clicking on the icon next to the text box or by using a (/) in front of each message ✉️ you send.
- Once you're finished, click on the ▶️ icon or press the ⌨️ Enter key.
ℹ️ To use quick messages click on General Settings ⚙️ and then click on Quick Messages located in the menu on the left - hand side of the platform