Steps to enable the Satisfaction Bot
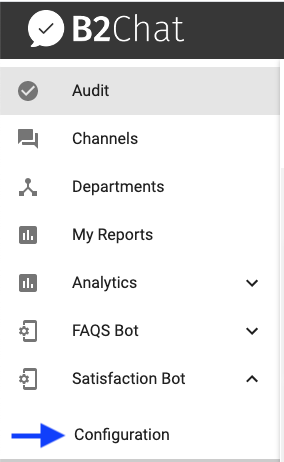
- To enter the Bot configuration option (Bot Setup) ⚙️, you must log in with an administrator user. In the menu on the left side of the platform, click on Satisfaction Bot, and then click on Configuration.
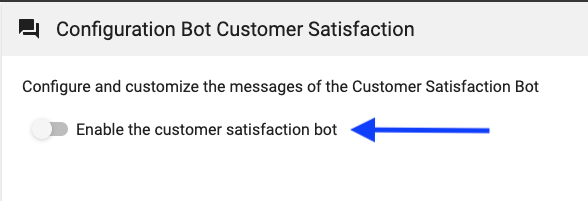
- Upon entering you will see a slider bar that will allow you to enable the Bot. Once enabled, it will begin to operate with a default configuration.
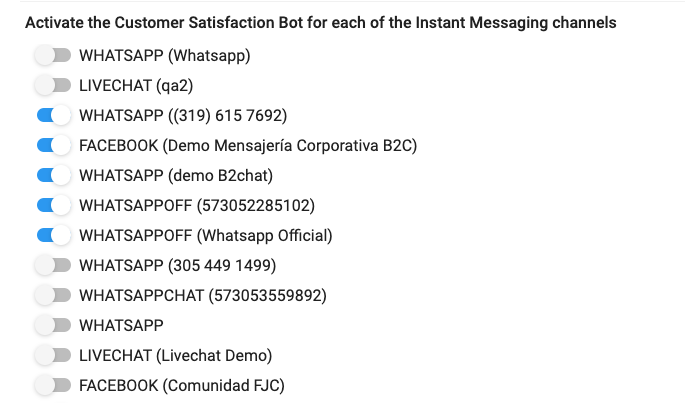
- Select the messaging accounts in which you want to enable the bot and click the Save button 💾 to publish the Bot🤖 .
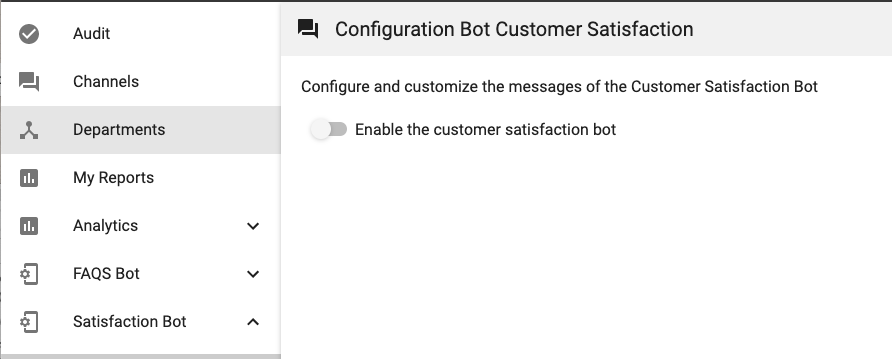
ℹ️ If your B2Chat account manages several sub-accounts to service customers from several businesses, a selector will appear where you can choose the sub-account you wish to enable and thus, configure the Satisfaction bot
Steps to set up the Satisfaction Bot
Once the bot 🤖, has been enabled, a series of settings for the Satisfaction Bot will appear on your screen. All of the optional steps in the process that the Bot follows to capture ratings by default are disabled. Below, we will explain each of these settings.
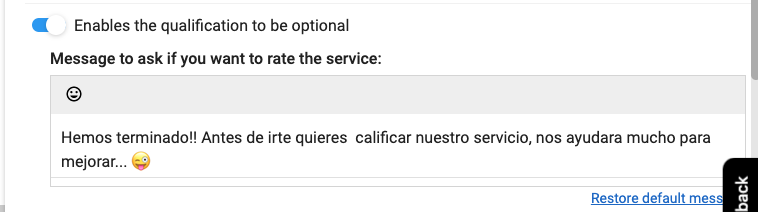
- Enable the qualification to be Optional - This setting is disabled by default, making ratings for the bot mandatory. If this option is enabled, the Bot will ask the customer whether or not they wish to rate a service before requesting the rating. If you wish to do so, you can customize the text for this step. If you want to return to the original message that is available by default, you can do so at any time by clicking on the Restore default message link.
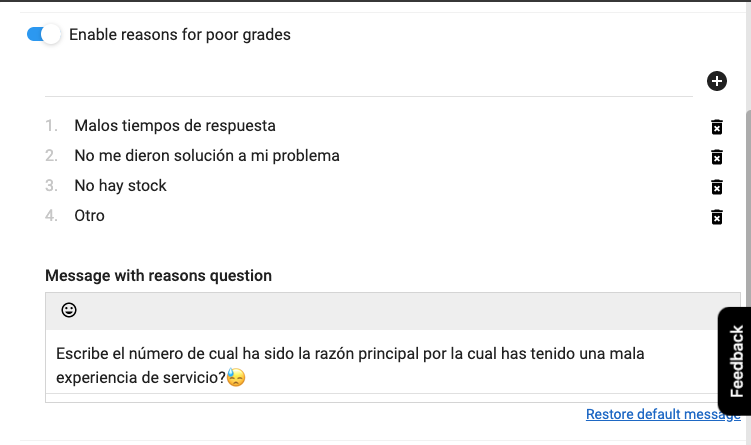
- Enable reasons for poor grades - This setting is disabled by default, if enabled, the Bot will present a list of bad rating reasons when the user gives a poor rating. This option will allow you to have a clearer vision of what reasons affect the quality of your service. If you wish to do so, you can customize the text for this step. If you want to return to the original message that is available by default, you can do so at any time by clicking on the Restore default message link. Once this option is enabled, you will be able to create, manage, adding new, or eliminating reasons whenever you want.
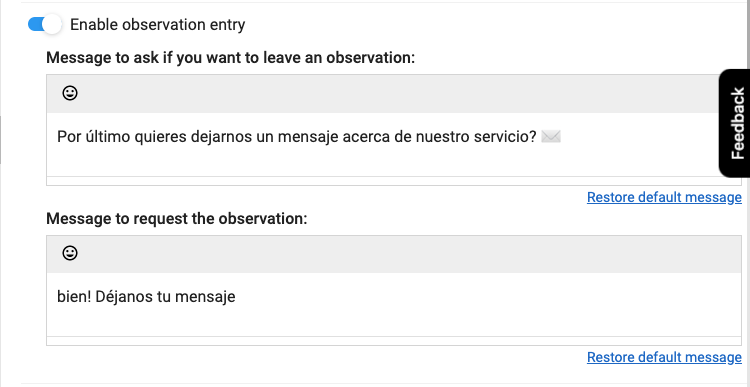
- Enable observation entry - This setting is disabled by default, if enabled, the Bot 🤖 will ask the customer if they want to leave an observation. If the customer's answer is Yes, the observation will be requested. If you wish to do so, you can customize the text for this step. If you want to return to the original message that is available by default, you can do so at any time by clicking on the Restore default message link.
- Operation mode - In this setting, you can select the bot rating mode you wish to enable, binary (good 👍 or bad 👎), or scale rating from 1 to 5 with stars ⭐⭐⭐. Additionally, you will be able to customize the general texts for the Satisfaction bot:
- Message to request service certification
- Validation message for invalid entry
- Exit message for retries: This message appears to the user when they have tried more than 3 times entering data that is not valid for the bot, in this case, the bot presents this message and removes them from the Satisfaction Bot is free to wait for a new chat 💬 .
- Activate the Customer Satisfaction Bot for each of your channels - Finally, to publish the bot, select the accounts in which you wish to enable the Satisfaction bot, and press the Save button 💾. From that moment, the bot will begin to capture ratings and give you visibility on your customers' levels of satisfaction.